Anything from misconfigured power management settings to a corrupted network driver can cause such an issue. In any case, the troubleshooting tips below should help you solve the problem in no time. So, let’s check them out.
1. Remove and Reconnect to Wi-Fi Network
The simple act of disconnecting and reconnecting to the Wi-Fi network is one of the most effective ways to fix such Wi-Fi issues on Windows. Hence, we recommend you start with that. Step 1: Right-click on the Start icon and select Settings from the list.
Step 2: Select the Network and internet tab from the left column and click on Wi-Fi on the right pane.
Step 3: Click on ‘Manage known networks.’
Step 4: Click the Forget button next to your Wi-Fi network.
Step 5: Head back to the Wi-Fi settings page, expand the ‘Show available networks’ section and connect to your Wi-Fi network again.
Observe if the Wi-Fi connection drops again.
2. Set Network Profile Type to Private
When you set your network connection type on your Windows 11 PC to Public, Windows imposes various firewall restrictions to protect your PC. This could cause the Wi-Fi connection to drop at times. You can try changing the network profile to Private to see if that helps. Step 1: Press the Windows key + A to open the Quick Settings panel. Step 2: Click the arrow next to the Wi-Fi toggle.
Step 3: Click the ‘i’ button next to your network.
Step 4: Under Network profile type, select Private network.
3. Run Windows Troubleshooter
Windows 11 includes a few troubleshooters that can help you fix various system-related issues. You can run the Internet Connections troubleshooter to scan your system for any problems causing it to disconnect from Wi-Fi repeatedly. Step 1: Press the Windows key + I to launch the Settings app. In the System tab, click on Troubleshoot.
Step 2: Click on Other troubleshooters.
Step 3: Under Most frequent section, click on the Run button next to the Internet Connections troubleshooter. If the issues persist, you can run the Network Adapter and Incoming Connections troubleshooters from the same menu.
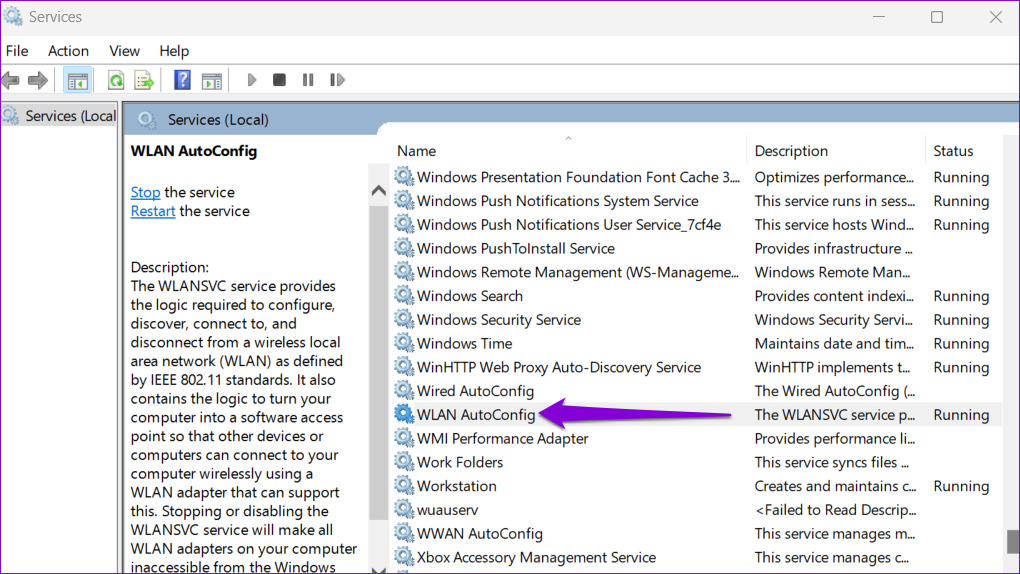
4. Configure WLAN AutoConfig Service
WLAN AutoConfig is a service that handles the connection between Windows and your Wi-Fi network. If the service is not working correctly, Windows may disconnect your computer from your Wi-Fi network. Here’s how you can fix that. Step 1: Press the Windows key + R to open the Run dialog. Type services.msc in the box and press Enter.
Step 2: Scroll down to locate and double-click the WLAN AutoConfig service to open its Properties.
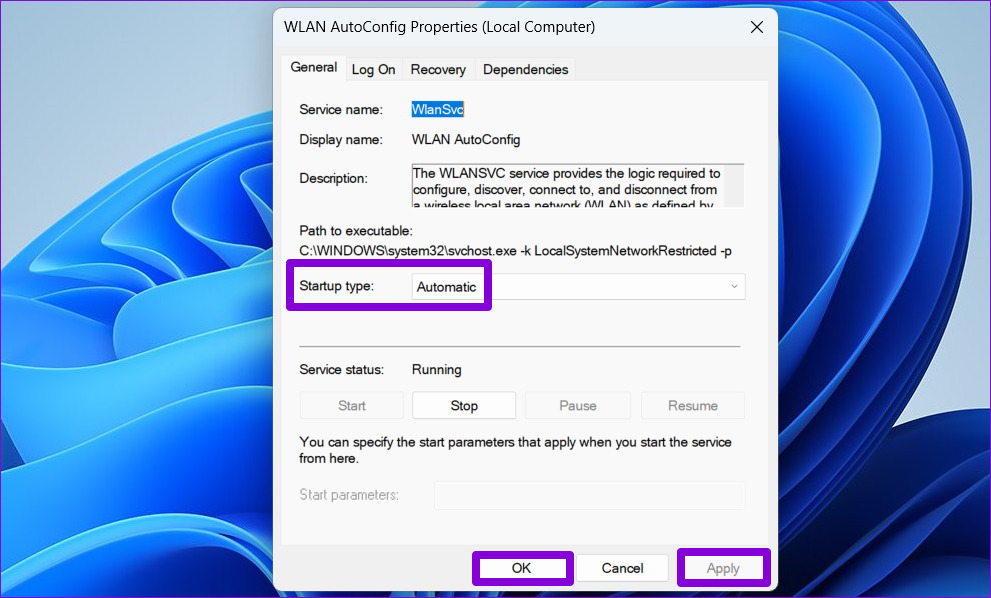
Step 3: Use the drop-down menu to change the Startup type to Automatic and hit Apply followed by OK.
Restart your PC after this and check if the issue is still there.
5. Check Power Management Settings
Windows may put some of your drivers and services to sleep if you select a stricter power usage profile. This can also cause your Wi-Fi connection to drop after a few minutes of inactivity. Here’s how to fix it. Step 1: Press the Windows key + X shortcut and select Device Manager from the resulting menu.
Step 2: Expand the Network adapters section. Right-click on your network adapter and select Properties.
Step 3: Under the Power Management tab, uncheck the ‘Allow the computer to turn off this device to save power’ box and click OK.
If the problem persists, you should ensure that your Wi-Fi adapter isn’t configured to save power by following the steps below. Step 1: Click the search icon on the Taskbar, type in edit power plan, and press Enter.
Step 2: Click on ‘Change advanced power settings.’
Step 3: Double-click on Wireless Adapter Settings to expand it.
Step 4: Under Power Saving Mode, use the drop-down menus next to On battery and Plugged in to select Maximum Performance. Then, hit Apply followed by OK.
6. Update Wi-Fi Drivers
If the current Wi-Fi driver on your PC is outdated, it could lead to such problems. You can try updating the Wi-Fi driver from the Device Manager to see if that helps. Step 1: Press the Windows key + S to open the search menu. Type in Device Manager and press Enter.
Step 2: Expand Network adapters, right-click on your network adapter, and select Update driver.
Follow the on-screen prompts to finish updating the wireless network driver and then monitor if the Wi-Fi connection drops again.
7. Flush DNS and Reset TCP/IP
A problem with the Transmission Control Protocol and Internet Protocol (or TCP/IP) can also cause Windows to disconnect from your Wi-Fi connection repeatedly. If that’s the case, resetting the TCP/IP stack should help. Step 1: Right-click on the Start icon and select Terminal (Admin) from the list.
Step 2: Select Yes when the User Account Control (UAC) prompt appears.
Step 3: Run the following commands in the console and press Enter after each one:
Restart your PC after running the above commands.
8. Reset Network Settings
If none of the above solutions work, you can reset your PC’s network settings as a last resort. Note that the process will remove all of your network adapters and restore all network settings to their default values. Step 1: Press Windows key + I to launch the Settings app. Navigate to the Network & internet tab and click on Advanced network settings.
Step 2: Under More settings, click on Network reset.
Step 3: Click the Reset now button next to Network reset.
Your PC will restart and revert to the default network settings. Following this, you should no longer encounter any network issues.
Stay Connected
Such Wi-Fi issues on Windows can keep you busy all day and impact your productivity. Hopefully, the fixes mentioned above will help you resolve the fix the random Wi-Fi disconnecting issue with your Windows 11 PC. The above article may contain affiliate links which help support Guiding Tech. However, it does not affect our editorial integrity. The content remains unbiased and authentic.