But sometimes users are not able to make their calls because the camera stops working on the Mac. This post covers all possible solutions to fix the built-in camera not working on Mac.
1. Check App Permission to Use the Webcam
We sometimes install apps in a hurry and often skip to assigning proper permissions, especially those meant for video calls. If you aren’t sure if you’ve denied the camera permissions for any app you want to use, it’s a good idea to check that. Follow these steps. Step 1: Press Command + Spacebar to reveal Spotlight Search, type System Preferences, and press Return.
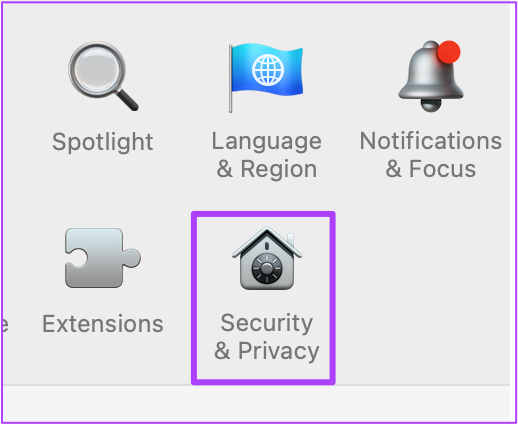
Step 2: Click on Security & Privacy.
Step 3: Click on the Camera option from the left menu.
You will see a list of all the apps with access to the camera on the Mac.
Follow these steps to allow an app to use the built-in camera. Step 1: Click on the Lock icon at the bottom left.
Step 2: Enter your Touch ID or Password.
Step 3: Enable camera access by clicking the checkbox next to the app name. Step 4: Click the Unlock icon to save changes.
2. Remove Screen Time Restrictions for Webcam
Screen Time feature arrived with the macOS Catalina. This tool helps you to track, manage, and restrict the use of apps on your Mac. With Screen Time, you can also restrict the webcam for a particular time period. If the built-in camera is not working on your Mac, you should check the Screen Time restrictions. Follow these steps. Step 1: Click on the System Preferences icon or press Command + Space to launch Spotlight search, type system preferences and press Return to launch it.
Step 2: Click on Screen Time.
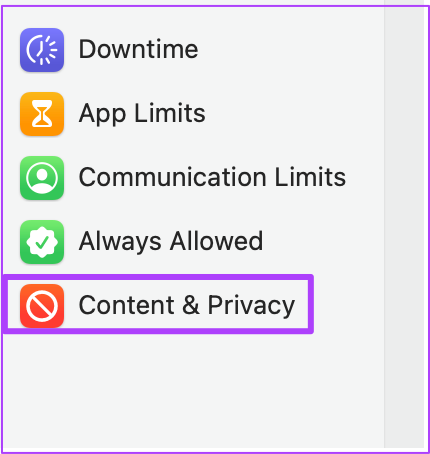
Step 3: In the Screen Time menu, click on Content & Privacy.
Step 4: Select the Apps tab.
Step 5: Check if the Camera has been allowed to be used. If not, click the checkbox to enable it.
3. Force Quit and Restart Apps Using Webcam
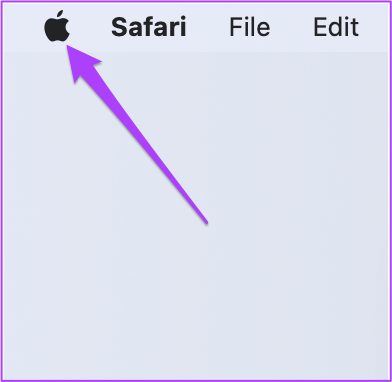
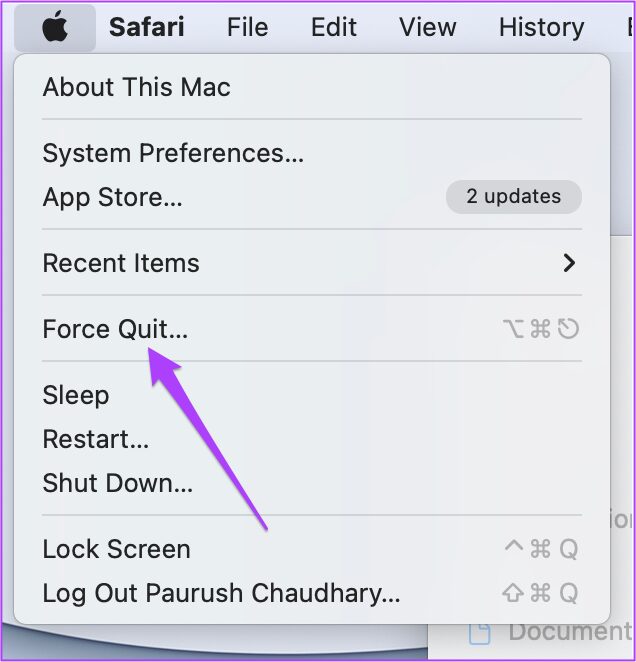
You can try to force quit and restart the apps that require to use the built-in camera of your Mac. For instance, if another app like FaceTime is already accessing the camera, then you can quit those apps and restart them. If you are using a website that requires you to click a picture through the webcam, you can force quit and restart your browser as well. Follow these steps. Step 1: Click on the Apple logo in the top-left corner.
Step 2: Select Force Quit from the drop-down menu.
Step 3: From the Force Quit tab, select the app that is using your webcam and click on Force Quit.
Step 4: Relaunch the app and try using the webcam again.
4. Reset SMC for Intel-Based Macs
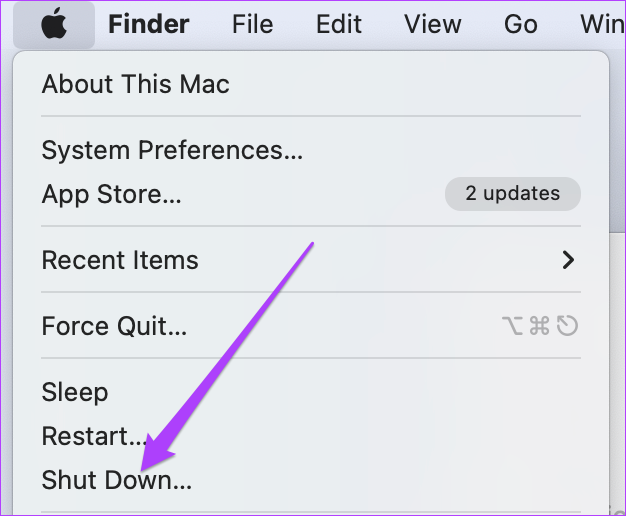
If you are using a Mac with an Intel processor, you can try to fix the issue by resetting the SMC (System Management Controller). It is a chip that controls and stores critical details of different hardware functions on your Mac. One of them is regulating the built-in camera. Follow these steps. Step 1: Click the Apple logo and select Shut Down.
Step 2: Wait for a few seconds and then restart your Mac. If the above steps don’t help, here’s an alternative method. Step 1: Shut Down your Mac once again.
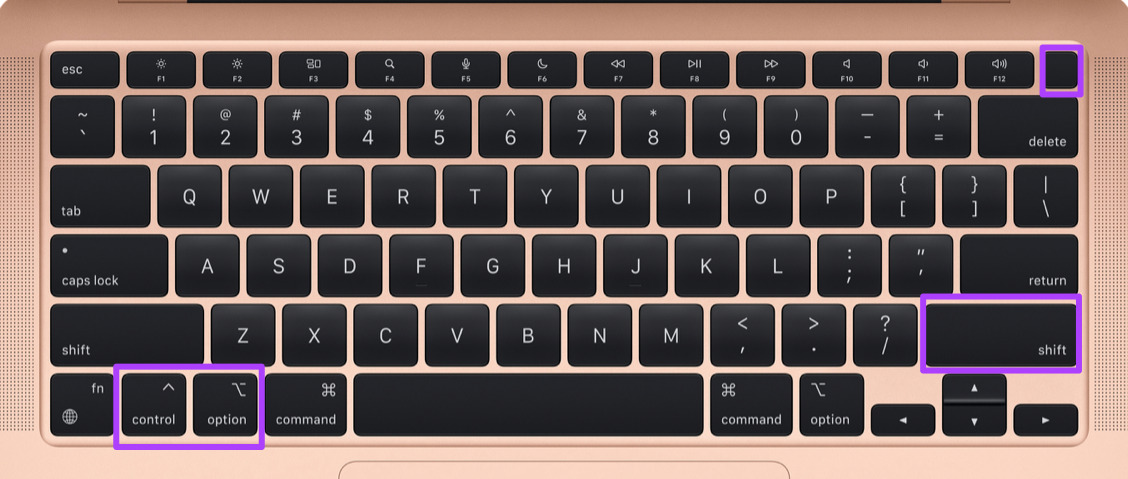
Step 2: Press and hold Shift + left Option + left Control key. Press and hold the Power button as well.
Keep pressing the four keys for another 7 seconds. If your Mac turns on, it will play the start up chime again while you hold down the keys. Step 4: Release all 4 keys and restart your Mac.
5. Restart the Built-in Camera Using Terminal
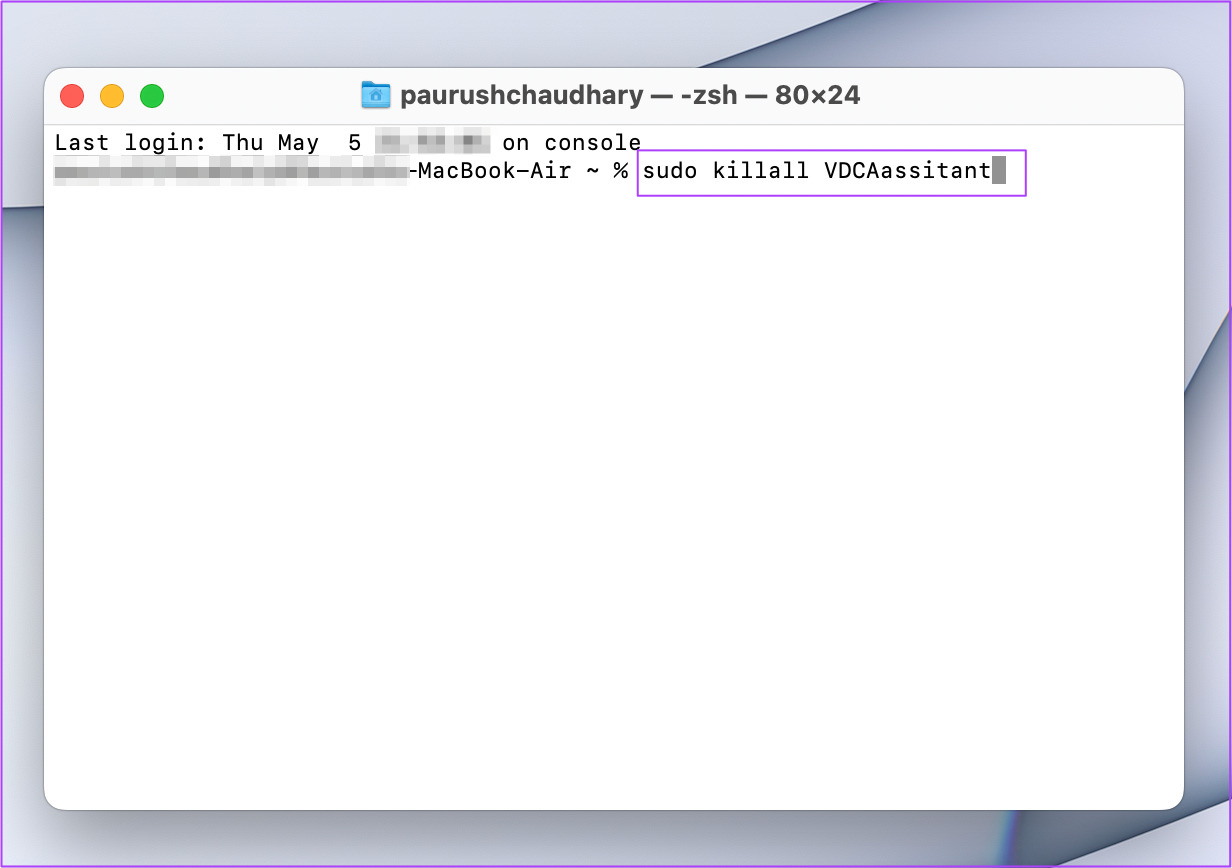
The built-in camera of your Mac will launch automatically whenever you use an app that requires it. But if that is not happening for you then you can try to restart the built-in camera manually using the Terminal app. Here’s how. Step 1: Press Command + Spacebar to open Spotlight Search, type Terminal and press Return.
Step 2: In the Terminal app, type sudo killall VDCAassitant and press Return.
This command will force quit all the apps that are using the webcam. Step 3: Enter your Mac password and press Return.
Open the app or website and try using the webcam.
6. Check Camera ID and Model Name in System Report
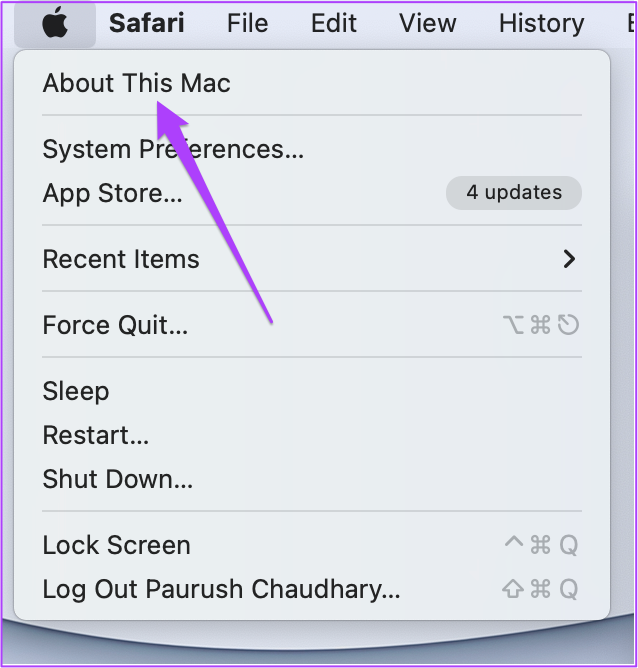
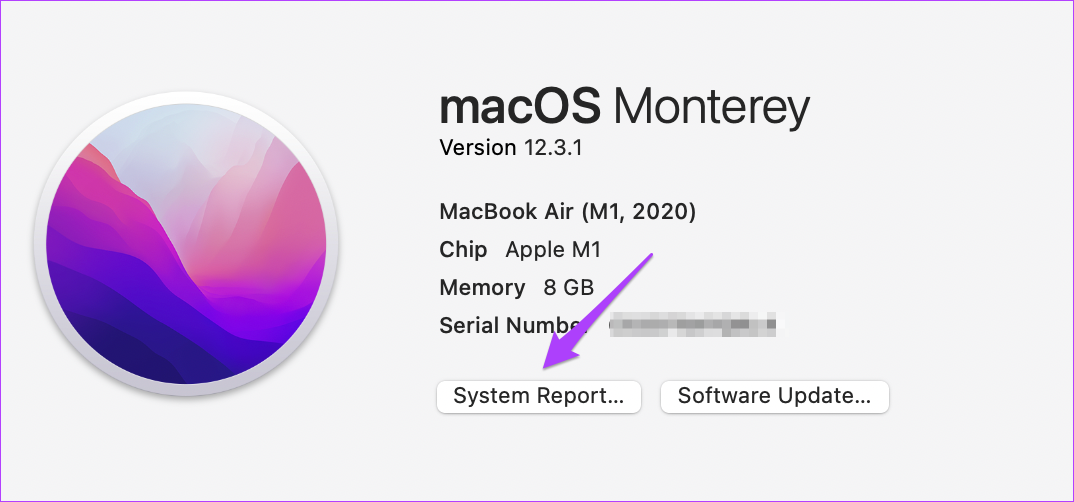
If none of the methods mentioned above work, there is a chance the built-in camera hardware might have gotten damaged. To check this, you can go to the System Report menu on your Mac. Follow these steps. Step 1: Click the Apple logo and select About This Mac.
Step 2: Click on System Report.
Step 3: Select Camera from the left menu.
Your built-in camera’s model ID and Unique ID should appear on the screen.
If it doesn’t, then your Mac’s camera is damaged or unavailable. In that case, you should visit your nearest certified Apple Service Center.
Fix the Built-in Camera of Your Mac
These solutions will help you if the built-in camera of your Mac stops working. It is always recommended to opt for the Apple Care+ plan while purchasing a new Mac. Also, the camera may not respond if you’re using your Mac in an exceptionally challenging environment (temperature-wise). The above article may contain affiliate links which help support Guiding Tech. However, it does not affect our editorial integrity. The content remains unbiased and authentic.











![]()


