One UI is so much better than the TouchWiz and has become a major win for the Galaxy devices. Besides tons of customization options, the One UI 3.0 update adds some neat tricks for the users. Apart from customizing it to your preference, you can use the new features to ensure your phone runs smoother and its battery lasts a bit longer.
1. Switch to Google Discover Menu
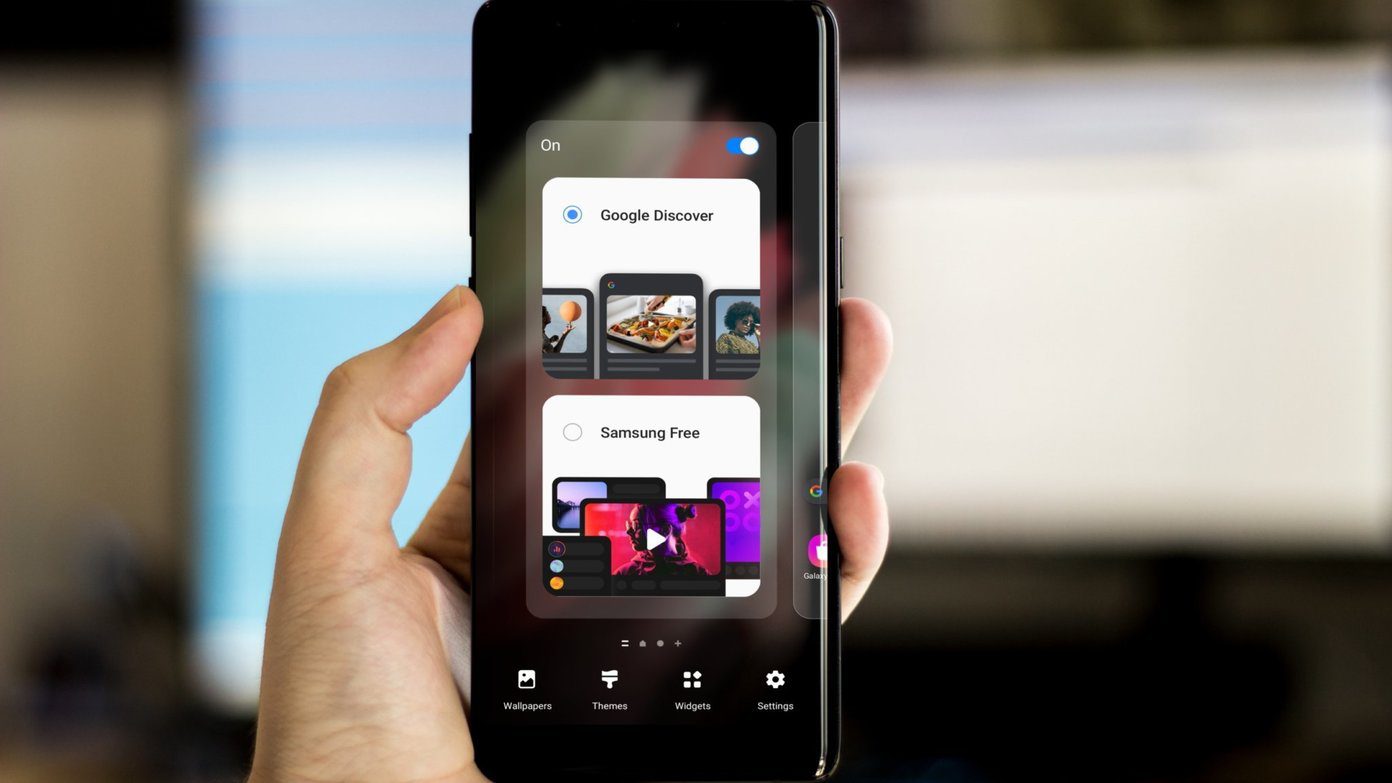
Samsung, by default, offers the Samsung Home menu to the left pane. Users have been asking for Google Discover integration for years. The company finally listened to the growing demand and added an option to switch to the Google Discover menu on the left side. Swipe right on the home screen. Hold down to the screen, and it will offer you to select between Samsung Home and Google Discover menu.
2. Change Home Screen Layout
Are you switching from the iPhone to Samsung and missing the continuous app drawer on the home screen? Samsung takes care of that as well. You can go to the Home screen settings and change the default layout for apps.
3. Add Lock Screen Widgets
Taking a page from Apple’s book, Samsung has added a trick to showcase the default widgets to the lock screen. You can add Music, Weather, Digital Wellbeing, Bixby Routines, and more from the Lock Screen option in the Settings menu.
4. Live Transcribe
Samsung finally implemented Google’s excellent Live Transscribe feature. Live Transcribe shows speech as text on your screen so that you can engage in conversations around you. You can type responses on screen while viewing the transcription. The option is buried inside the Settings > Accessibility menu.
5. Explore Call Backgrounds
Samsung offers a cool personalization option during calls. From the call settings menu, you can create customized call backgrounds. You can select a picture or video when you call or receive one from the other person. There are a bunch of layouts and backgrounds.
6. Remove Location While Sharing Photos
This one is a neat privacy trick to remove location data from the photos. When you hit the share button to send the selected picture, One UI will remove the location data from the image.
7. Customize Notification in Status Bar
Those coming from the iPhone world will appreciate this one. By default, the Android OS showcases the number of notification icons from the apps. You can restrict that to the last three apps and make things less crowded on the status bar. Go to the Settings > Notification > Advanced options and change the status bar to showcase three recent notifications.
8. Customize Always On Display
Many Android OEMs offer an AOD (Always On display) option. However, Samsung takes the experience further with tons of customization options. Open the Always On Display from the Settings menu. You can select from many clock styles, add an image as a lock screen, and even play with gradient colors to customize the experience.
9. Enable Wireless Power Sharing
This option is only available for those with high-end Samsung smartphones, such as the Galaxy S21 series. Using Wireless Power sharing, one can share the device battery juice with compatible devices and accessories. Simply enable the option from the device Battery menu and place your smartwatch or earbuds on the back of the device. The device will wirelessly share the battery.
10. Enable Notification History
This one is straight from the Android 11 OS. You can enable the notification history from the Settings menu and glance at which app sends notifications frequently to the device.
11. Customize Side Key
Honoring the user demand, Samsung is offering a way to customize the side key experience. Navigate to Settings > Advanced Features > Side Key and you can allow it to open Bixby, Camera, or any app. One can also customize the press and hold side key function.
12. Turn off Screen by Double Tap Gesture
You no longer need to press the Power button or use a third-party gestures app to lock the screen quickly. Enabled by default, you can turn off the screen by simply double-tapping a space on the home screen. If you want to disable the feature or it doesn’t work, navigate to Settings > Advanced Features > Motions and gestures. Enable the toggle for ‘Double tap to turn off screen.’
13. Use Powerful Search
If you’ve never used the search feature on your Samsung phone, it’s time to reconsider it. You might like it because One UI 3 enhances the Finder’s search capabilities. As a result, in addition to apps and contacts, it now includes settings and search suggestions.
14. Continue on Other Devices
If you use multiple Samsung Galaxy devices, you might want to take advantage of Continue apps on other devices feature. With the feature enabled, you can continue using apps like Samsung Notes and Samsung Internet browser on a different device just from where you left on the first device. The feature also lets you copy text, images, etc., on one Samsung phone and paste them on another. To use this feature, go to Settings > Advanced features. Tap on Continue apps on the other devices. Turn on the feature.
15. Use Google Duo Integration
Samsung has partnered with Google to deliver a native integration with the Samsung Phone app. When you dial a number, you have an option to make a call using the Google Duo app or the call app.
Explore One UI Capabilities
Go through the tricks above and start using One UI like a pro. While you are at it, let us know about your favorite addition to the One UI 3. Next up: Microsoft launcher is another capable Android skin out there. Read the comparison post below with Samsung One UI to learn all the differences. The above article may contain affiliate links which help support Guiding Tech. However, it does not affect our editorial integrity. The content remains unbiased and authentic.