Footers can also help you to add information such as references and page numbers. Wondering how to add headers and footers to your Word document? This post will show you how to insert, edit, and delete the headers and footers in a Microsoft Word document.
How to Manage Headers in Microsoft Word
A header in Microsoft Word is the top-most section in a Word document. That displays all kinds of information like document topic, page number, company logo, author’s name, etc. Here’s how to manage headers in your Microsoft Word document:
Inserting a Header
The steps below will guide on how to insert a header in Microsoft Word: Step 1: Click on the Start button type microsoft word, and hit Enter to aunch the Microsoft Word document.
Step 2: On the Ribbon, click on the Insert tab.
Step 3: Click on Header.
There are some built-in header designs that you can choose from. Step 4: Select any of the templates provided and MS Word should add that template to your document. Step 5: Move your cursor to the header and type your desired text.
Step 6: Click on Close Header and Footer after you provide the text. Alternatively, you can press the Esc key on your keyboard.
Edit a Header
The steps below will help you to edit a header in Microsoft Word: Step 1: Place your cursor at the top of the Word document where the header lies and double-click to launch the Header and Footer editing tool.
Step 2: Move your cursor to the header part that you want to edit and make your edits.
Step 3: After editing your header, click on Close Header and Footer in the Ribbon to close the editing tool. Alternatively, you can double-click anywhere in your document asides from the header section to close the editor.
Deleting a Header
Check the steps below to learn how to delete a header in Microsoft Word: Step 1: Click on Insert in the Ribbon.
Step 2: Select Header from the list of options.
Step 3: Click on Remove Header.
Once you follow these steps, Word delets the header from your document automatically. Let’s look at how to manage footers in Microsoft Word.
How to Manage Footers in Microsoft Word
Managing footers in Microsoft Word is very similar to managing headers. The process for footers remains nearly the same as we discussed above for the headers section. Here’s how it works:
Inserting a Footer
Here’s how to insert a footer in Microsoft Word: Step 1: Click on the Start menu button, type microsoft word, and hit enter to launch the Microsoft Word document.
Step 2: On the Ribbon, click on the Insert tab.
Step 3: Click on Footer.
Just like with headers, there are built-in footer designs for you to choose from. Step 4: Select any of the templates provided, and MS Word should add that template to your document.
Step 5: Move your cursor to the footer, then provide your preferred text.
Step 6: Click Close Header and Footer after adding text. Alternatively, you can press the Esc key on your keyboard.
Editing a Footer
In case you want to add more details or fix something in the footer, you can follow the steps below to edit a footer in Microsoft Word: Step 1: Double-click on the footer that you need to edit. This action launches the Header and Footer editing tool.
Step 2: Move your cursor to where you need to add information in the footer and make your edits.
Step 3: After editing your footer, click Close Header and Footer in the Ribbon. This action will close the editing tool. Also, you can double-click any part of the document asides from the footer section to close the tool.
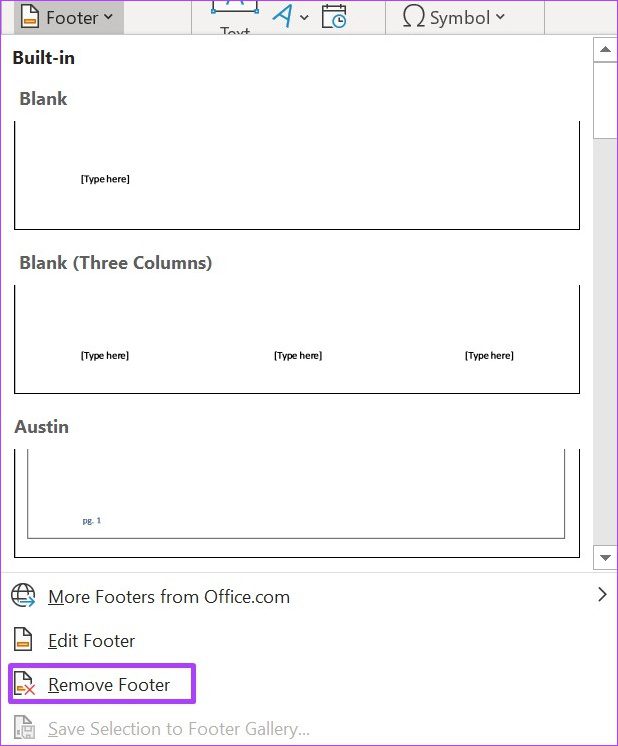
Deleting a Footer
The steps below will show you how to delete a footer in Microsoft Word:. Step 1: Click on Insert in the Ribbon.
Step 2: Select Footer from the list of options.
Step 3: Click Remove Footer.
Make Your Microsoft Word Document Better.
Headers and footers can certainly make your document stand out. Another Microsoft Word feature that works similarly is Endnotes and Footnotes. These features help provide references or further comments on different parts of the main text body of a Word document. The above article may contain affiliate links which help support Guiding Tech. However, it does not affect our editorial integrity. The content remains unbiased and authentic.