When you want to make the best of your time and just ‘catch up’ with the emails or other things on the web, you can use Narrator. For instance, you can knit or feed your baby while listening to the Narrator reading content out loud. Here’s how to set up, use, and customize the Narrator tool on Windows 11. So, without further ado, let’s get right to it.
How to Enable Narrator on Windows 11
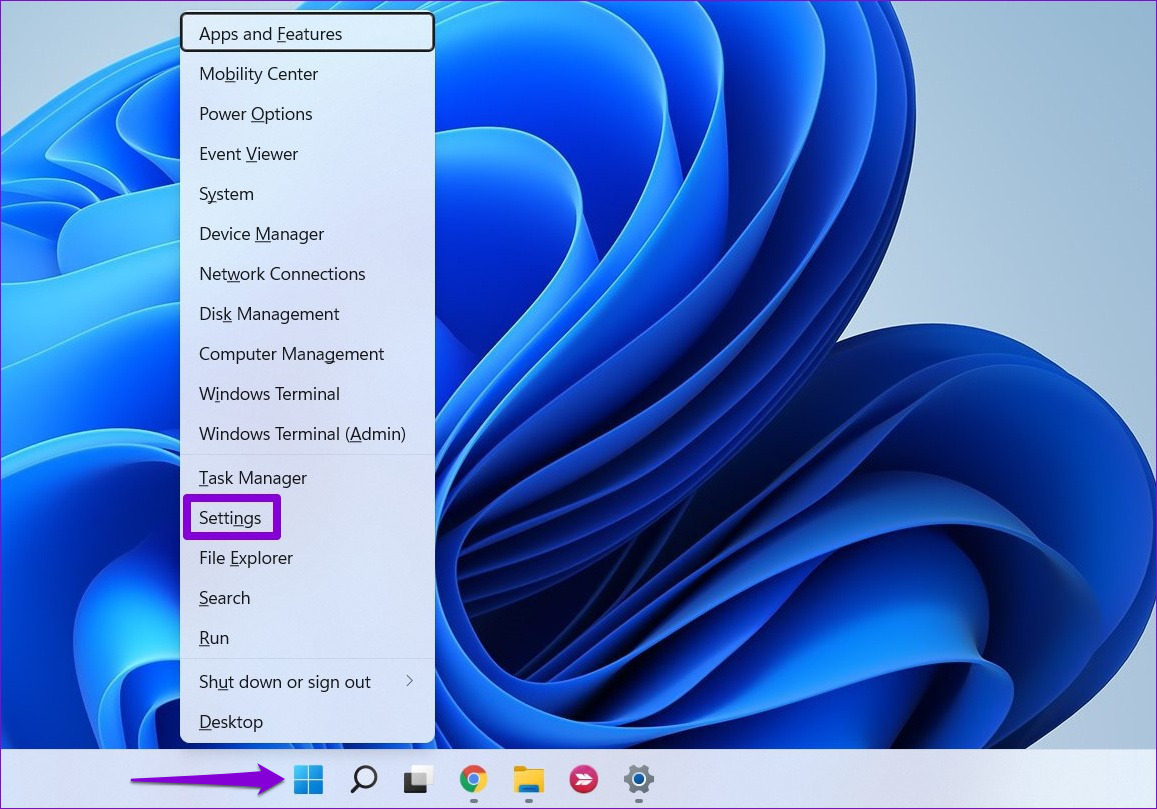
Windows 11 lets you access the Narrator in a few different ways. You can either use a keyboard shortcut to enable Narrator or configure it to start automatically before or after you sign in. Irrespective of how you summon it, you’ll need to set it up first. Follow the steps below to set up Narrator on Windows 11. Step 1: Right-click on the Start icon and select Settings from the menu that appears.
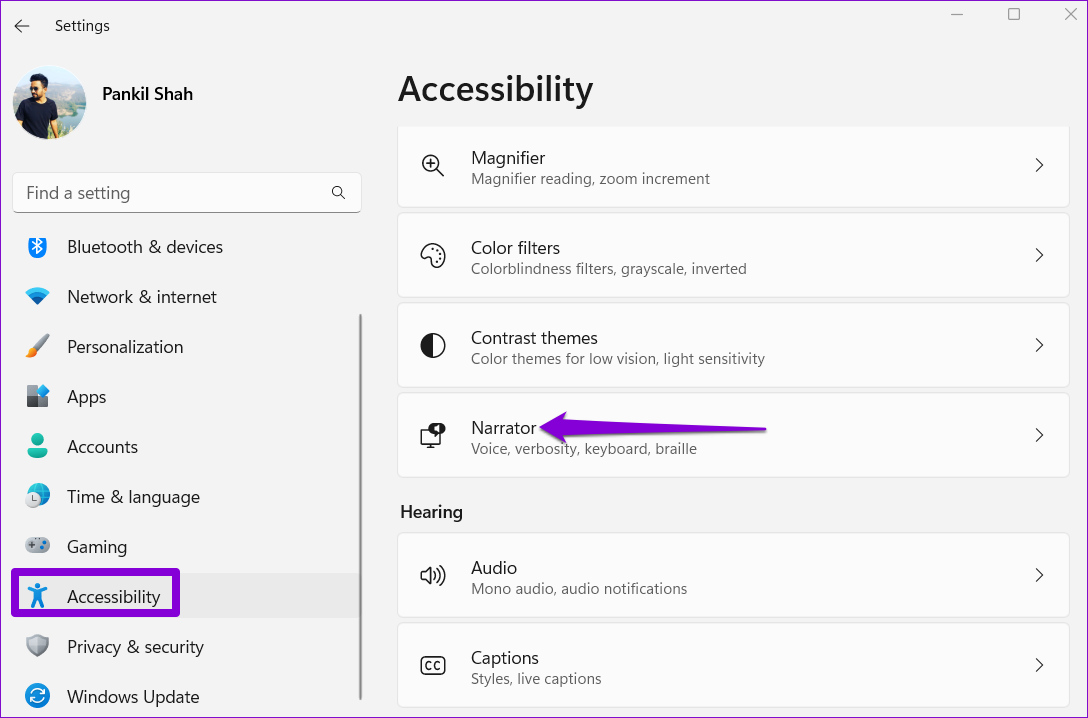
Step 2: Navigate to the Accessibility tab and click on Narrator.
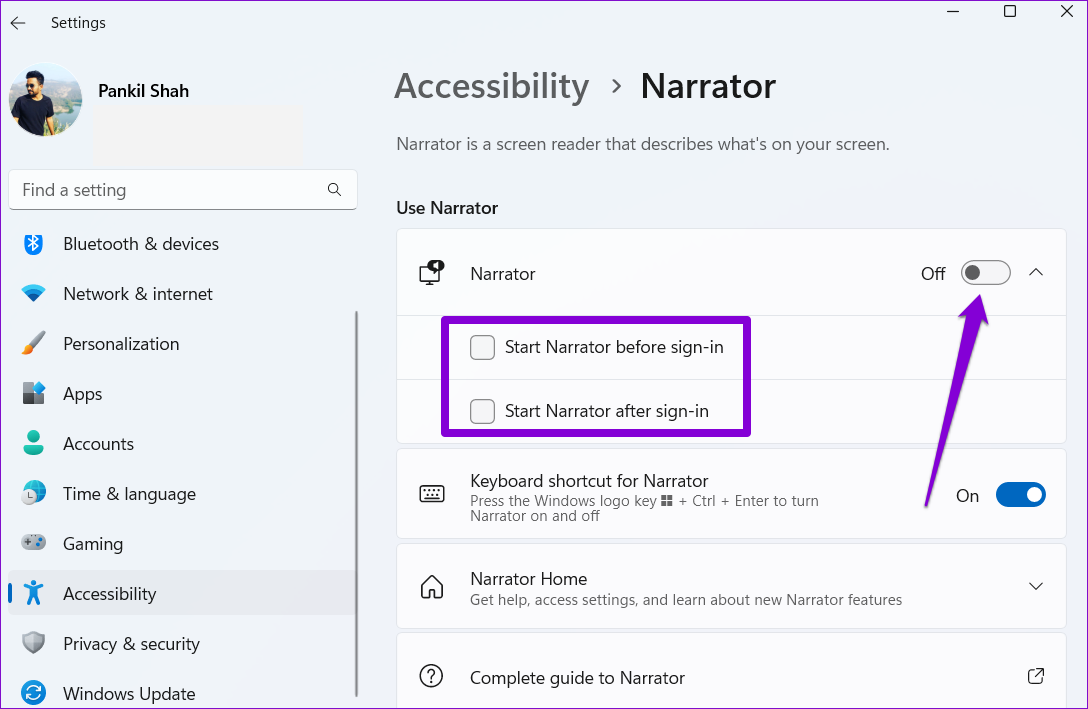
Step 3: Enable the toggle next to Narrator to start using it right away. Optionally, you can configure Narrator to start automatically before or after you sign in.
You can also enable the Windows key + Ctrl + Enter keyboard shortcut for the Narrator to access it quickly.
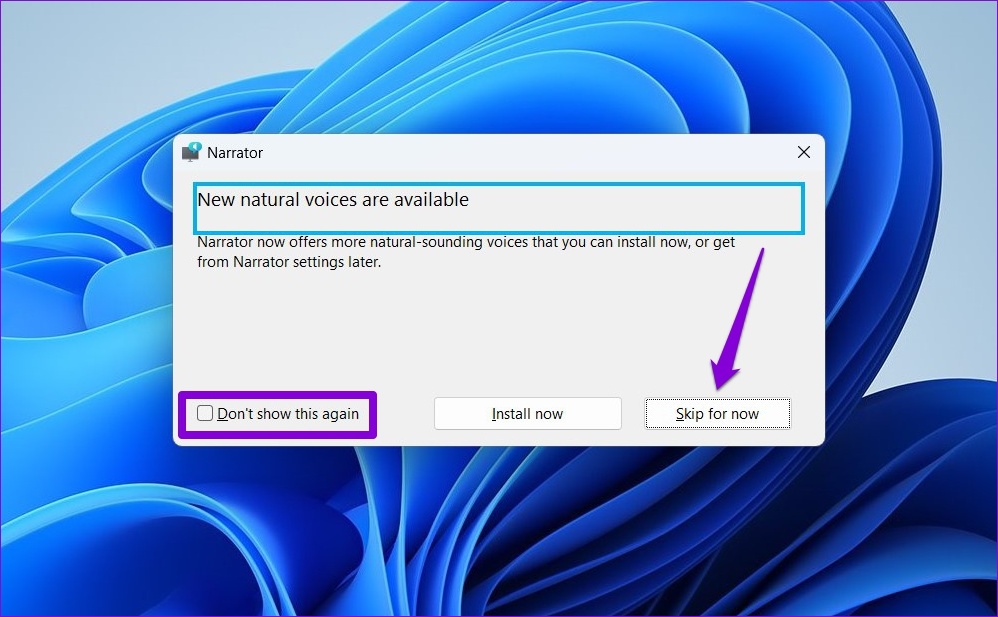
After you enable Narrator from the Settings menu or via the keyboard shortcut, a Narrator dialog will appear on your screen. If you don’t wish to see this dialog every time you launch Narrator, check the box that reads ‘Don’t show this again’ and click Skip for now.
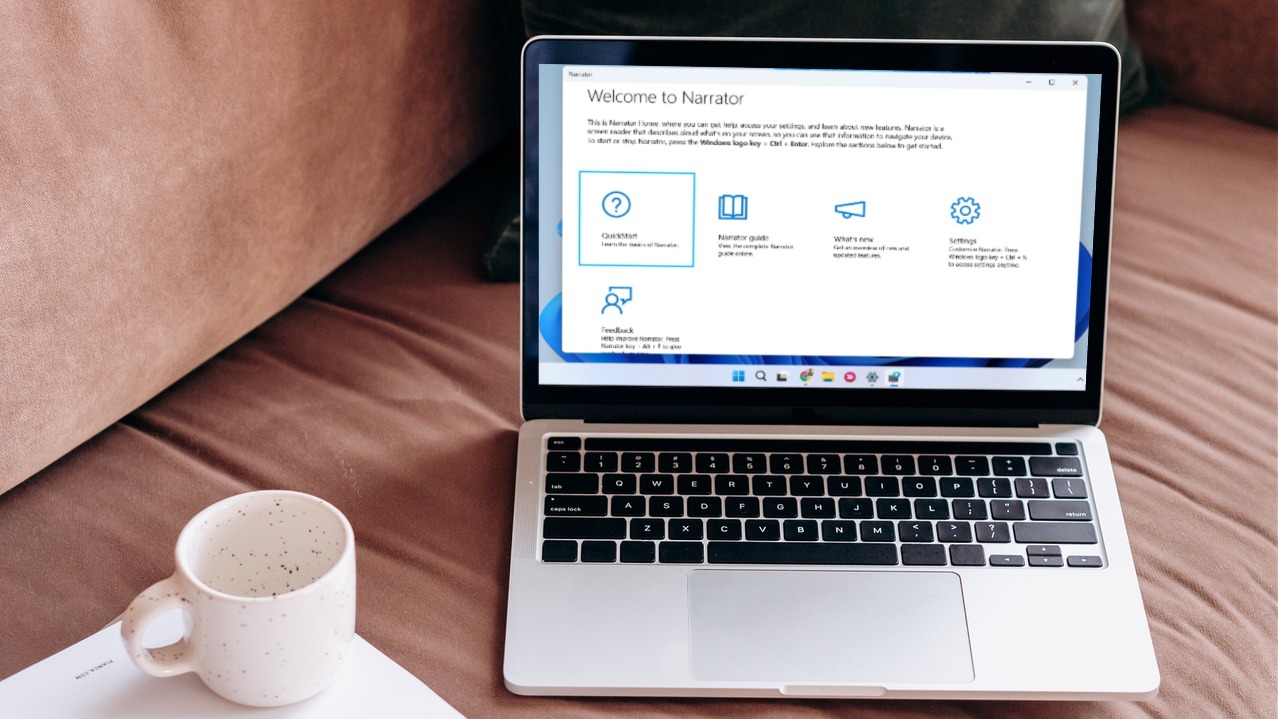
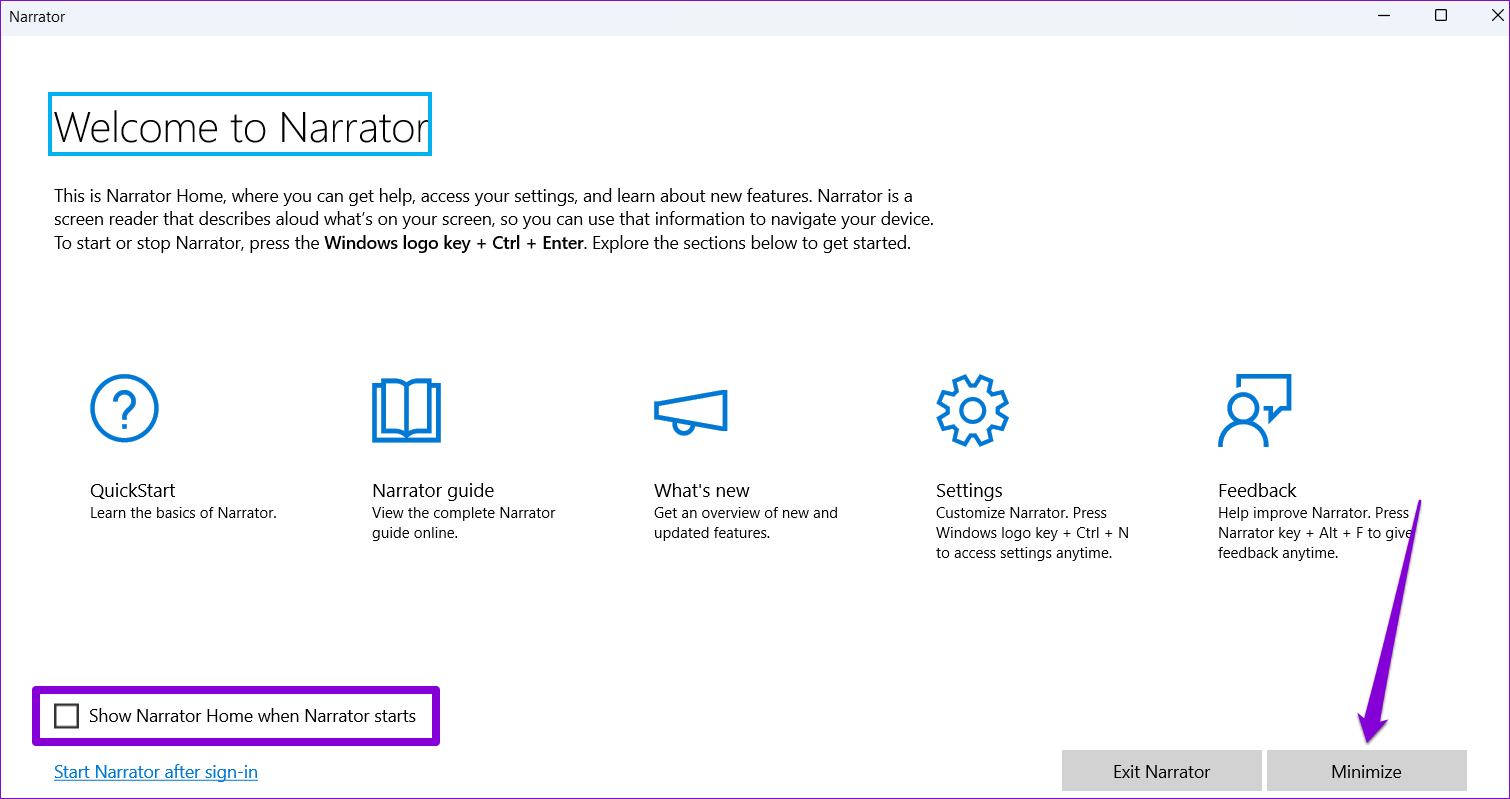
This will open Narrator Home, where you can read about some of its functions and commands. Uncheck the box that reads ‘Show Narrator Home when Narrator starts’ if you don’t want Narrator Home to pop up every time you use Narrator. Then, click on Minimize to start using Narrator.
How to Customize Narrator’s Settings on Windows 11
By default, the Narrator will describe everything on your screen, including interface elements such as buttons, icons, controls, and more. However, if you just want to use the Narrator to read emails, web pages, or documents, you can configure Narrator’s settings by following the steps below. Step 1: Press the Windows + I to open the Settings app. Switch to the Accessibility tab and click on Narrator.
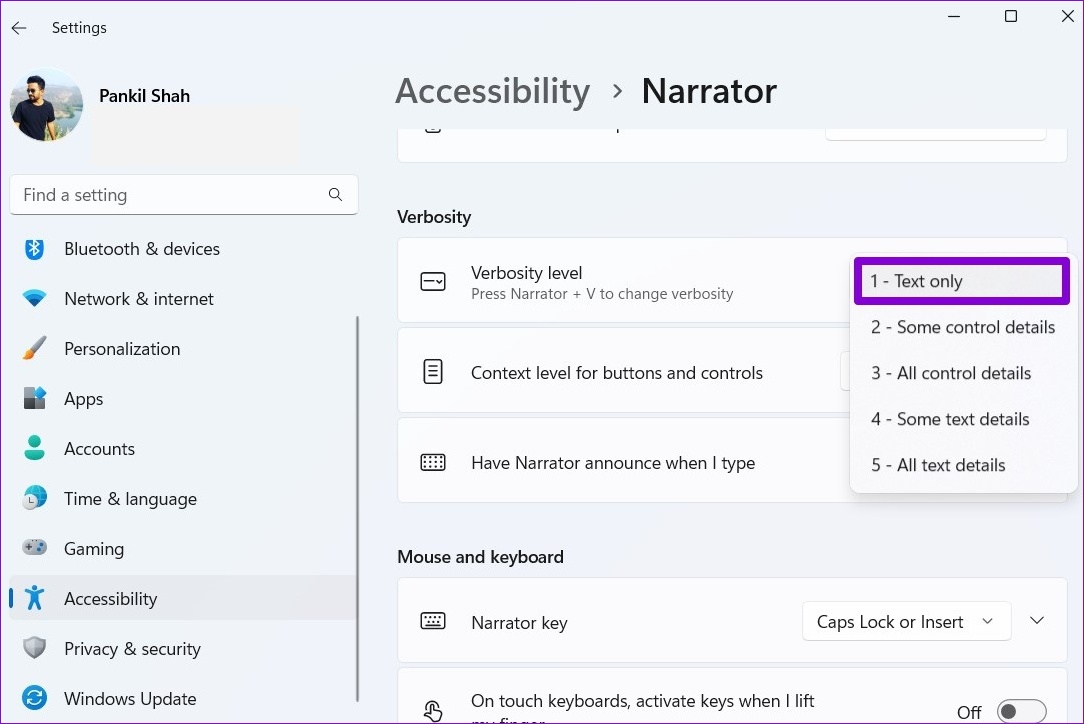
Step 2: Scroll down to the Verbosity section. Then, use the drop-down menu next to the Verbosity level to select Text only.
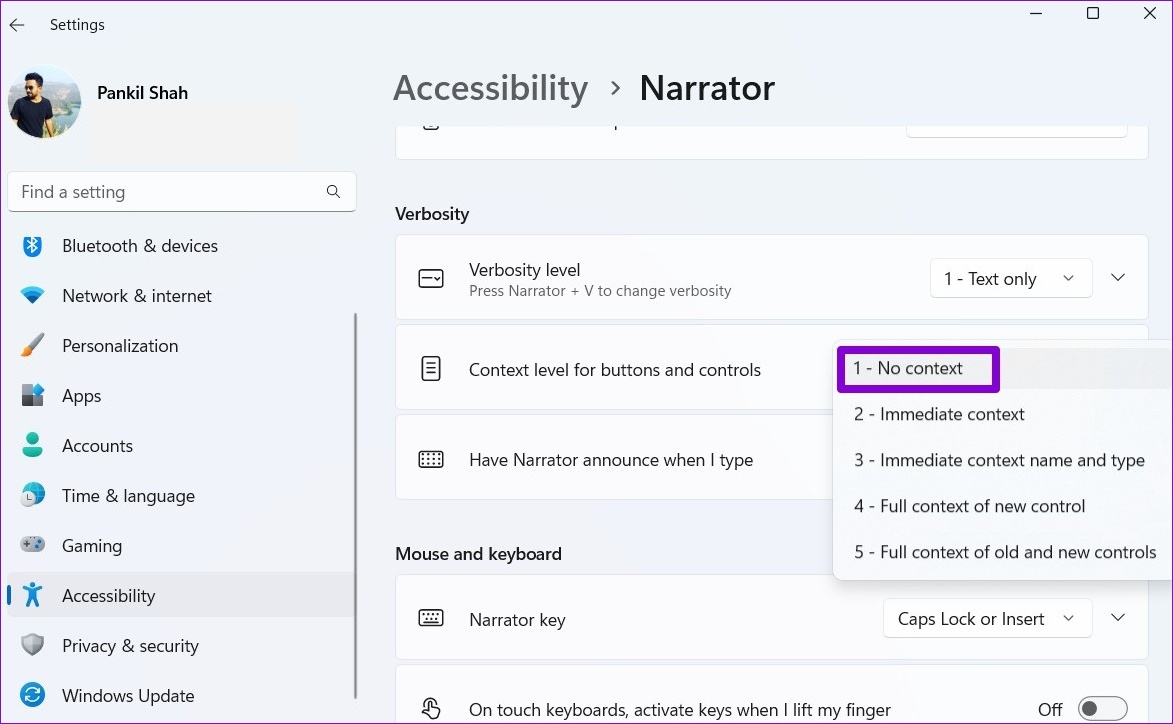
Step 3: Next, use the drop-down menu next to the ‘Context level for buttons and controls’ to select No context.
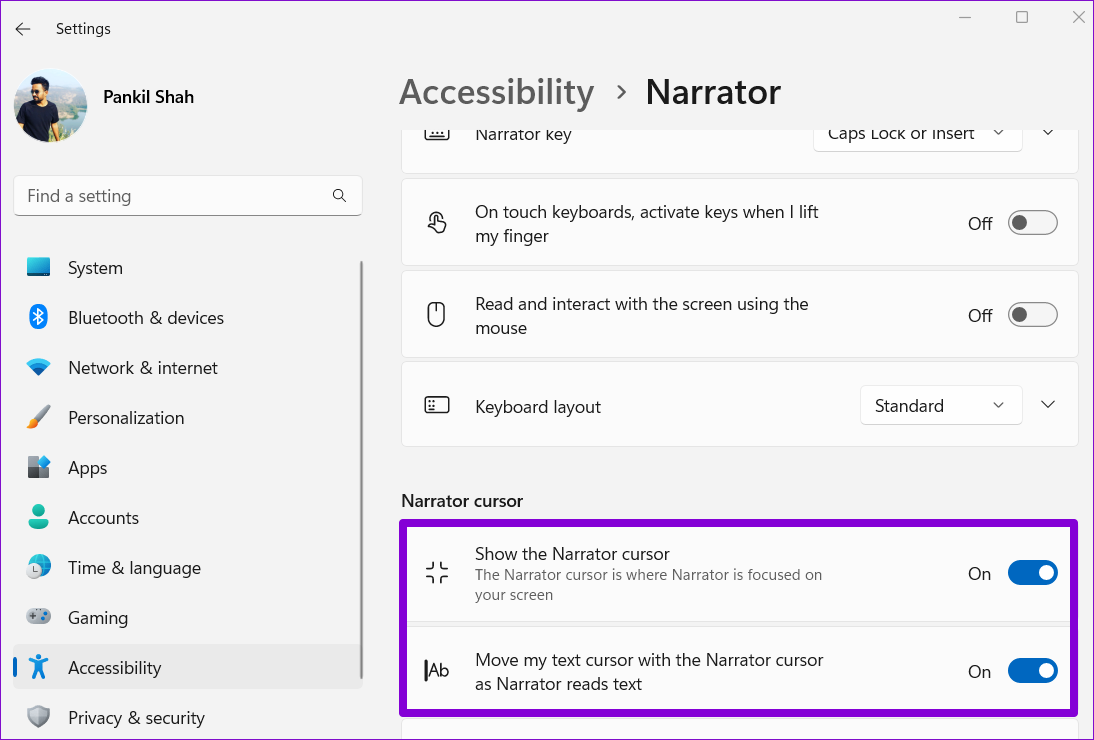
Optionally, you can enable the Narrator cursor from the same menu so that the cursor moves as the Narrator reads your screen out loud.
How to Make Narrator Read Your Screen Out Loud
After you configure the necessary settings, you can make Windows 11 read text out loud. To try it out, open any web page or document on your PC and press the Windows key + Ctrl + Enter to enable Narrator. The Narrator reads the text and uses a blue rectangle to indicate the word being read.
You can also use your mouse to highlight a specific paragraph or line and the Narrator will start reading the same. Similarly, you can use Narrator on any screen to make Windows 11 read emails, web pages, documents, and more.
How to Change Narrator’s Voice on Windows 11
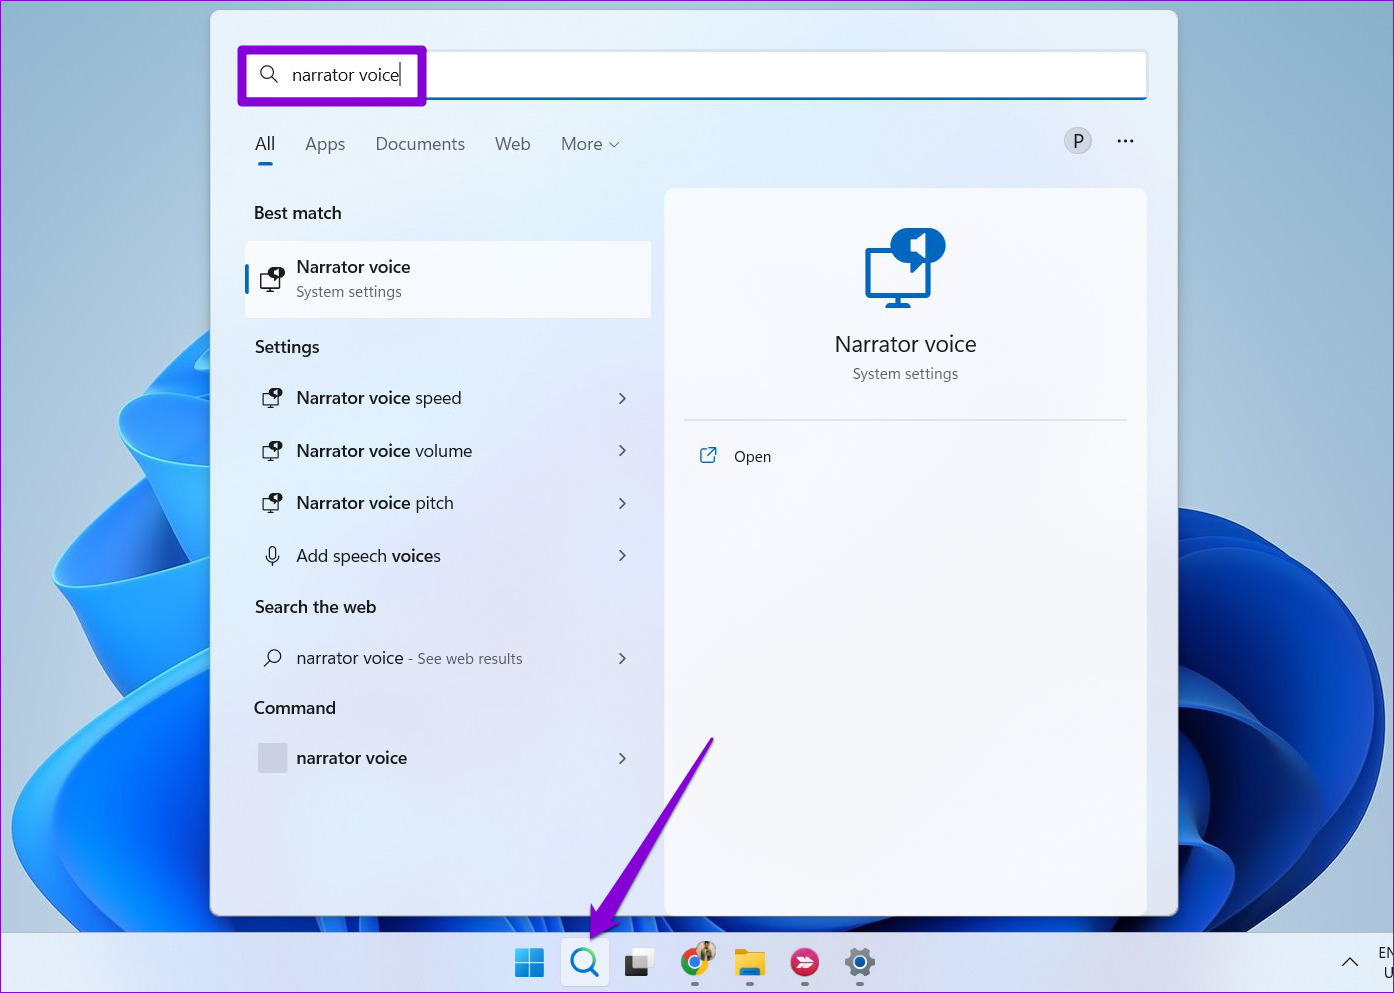
The Narrator’s default voice on Windows may sound robotic to you. Luckily, Windows lets you customize Narrator’s voice in different ways. Here’s how you can go about it. Step 1: Click the search icon on the Taskbar, type in narrator voice, and select the first result that appears.
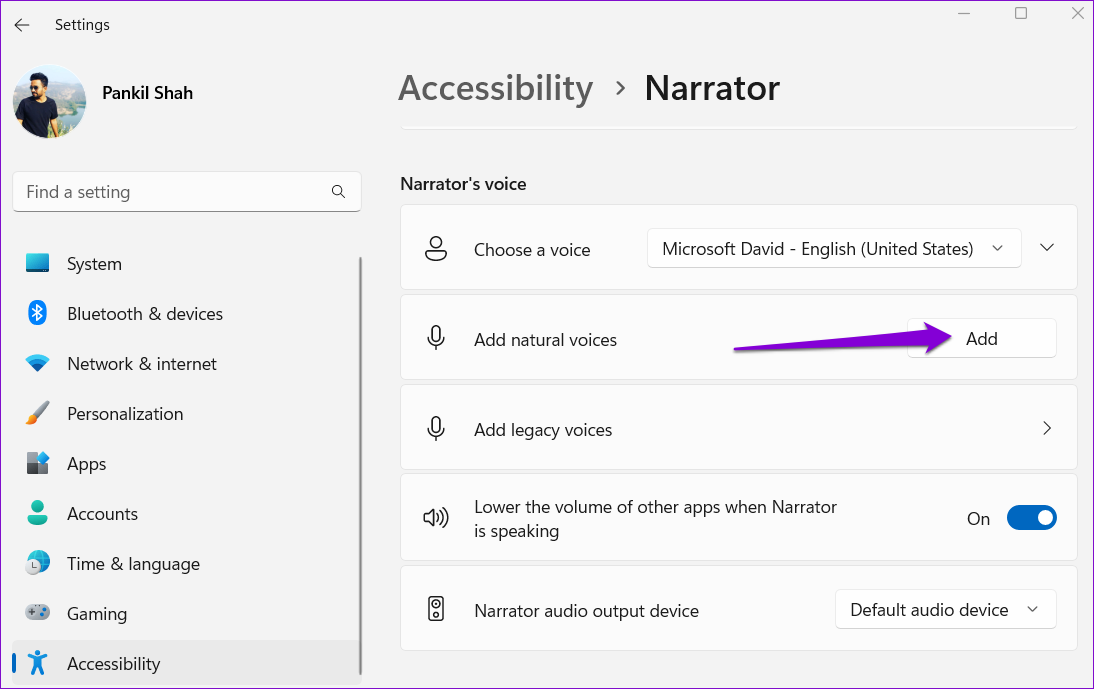
Step 2: Use the drop-down menu next to ‘Choose a voice’ to select a voice that you like.
Step 3: Under Choose a voice, you can use the sliders to adjust the narration’s Speed, Pitch, and Volume.
Additionally, you can also download natural voices for the Narrator. For that, click the Add button next to Add natural voices.
Select the voice that you wish to download and click on Install. You can also preview the voice before downloading it.
Ask Windows to Read Your Screen
Getting Windows to read text on the screen out loud gives you the freedom to just listen while you engage in other tasks. Thanks to Microsoft’s Narrator tool, you won’t be needing any third-party screen-reading apps for your PC. The Narrator tool works similarly on the Windows 10. The above article may contain affiliate links which help support Guiding Tech. However, it does not affect our editorial integrity. The content remains unbiased and authentic.