Locking parts of a document allows you to restrict the changes that can be mad to it. On Microsoft Word, there are two ways to go about it using the restrict editing feature or content control option from the developer tab. Here’s how to use both methods:
Restrict Editing Feature
The restrict editing feature on Microsoft Word allows users to create section breaks within a document before locking them. Certain sections of the document are editable while there’s no way to make any changes in other parts. The steps below will guide you through the process: Step 1: Click on the Start menu, type word, and launch the Word document in which you want to lock the parts.
Step 2: On the Ribbon, click on the Review tab and click on the drop-down beneath the Protect option.
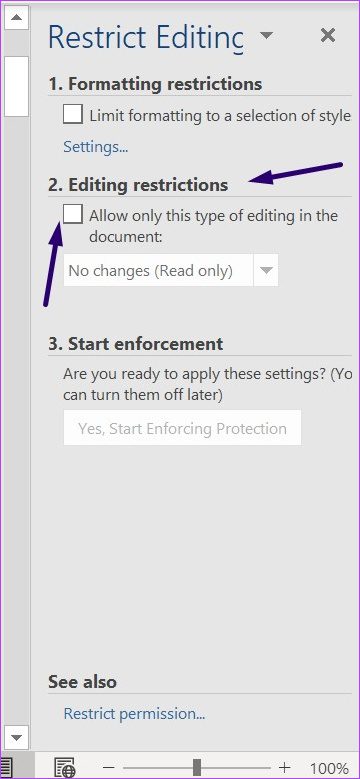
Step 3: Click on Restrict Editing from the drop-down and a new Restrict Editing window should open up by the right of your document.
Step 4: Under the Editing Restrictions field, tick the box beside Allow only this type of editing in the document.
Step 5: Select No changes (Read only) from the drop-down.
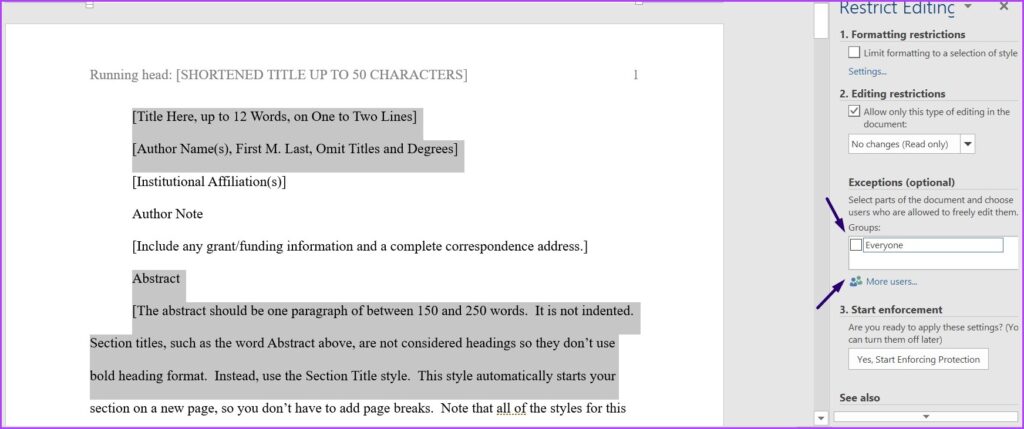
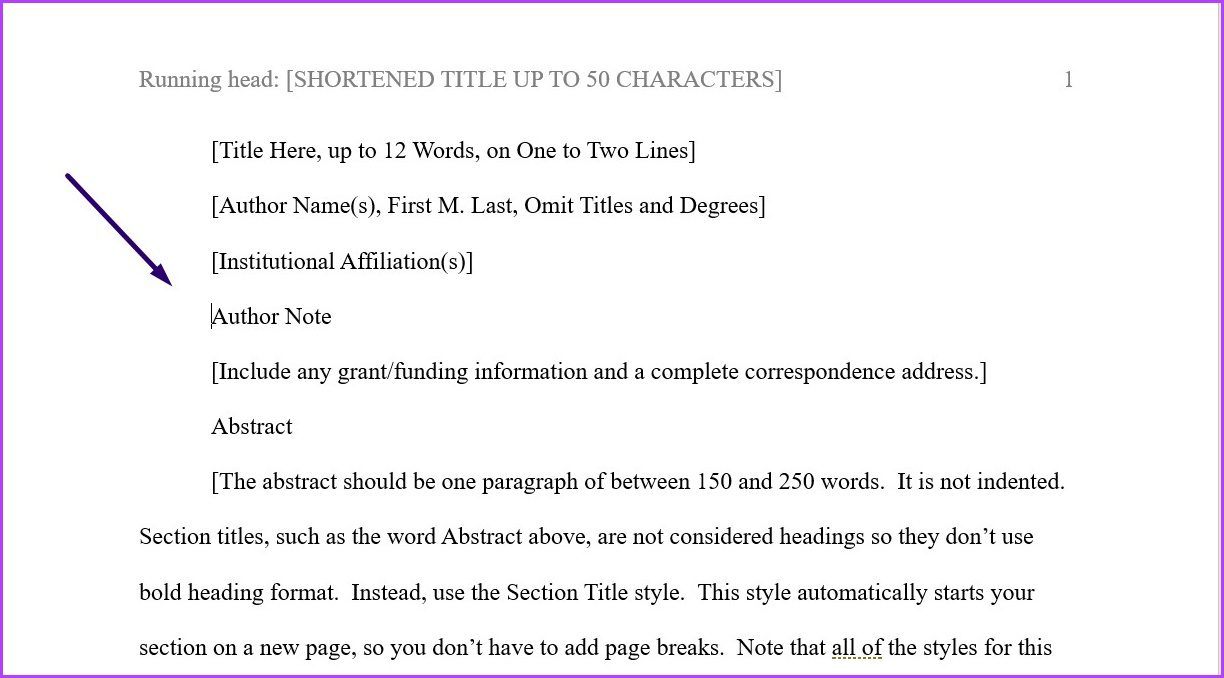
Step 6: Place your cursor on the Word document and select the sections other users can edit.
Step 7: Back on the Restrict Editing window, under the Exceptions field, either tick the box beside everyone or select More users to input the addresses of individuals who can edit select parts of the document.
Step 8: Under the field titled Start enforcement, click Yes, Start Enforcing Protection.
Step 9: On the Start Enforcing Protection dialog box, choose between using a Password or User authentication to restrict access to the Word document.
Step 10: If you select the Password option, input your desired password. If you select the User authentication option, individual users that appear the More users exceptions field can edit the document.
Step 11: Click OK to save your selection.
Step 12: Save the document. After this, Word will lock the sections that you chose protect.
Content control on developer tab option
You can use the content control feature in the Developer tab to lock selected parts of a Word document. Check the steps below to learn how to use this method: Step 1: Click on Start menu, type word, and hit Enter to launch the Word app.
Step 2: Place your cursor on the Word document and select the section you would like to restrict access to.
Step 3: On the Ribbon, click on the Developer tab and click on the Rich Text Content Control option.
Step 4: Still in the Developer tab, click on the Properties button.
Step 5: On the launched Content Control Properties dialog box, provide a name for the content control.
Step 6: Tick the box beside the Content control cannot be deleted option.
Step 7: Tick the box beside the ‘Contents cannot be edited’ option.
Step 8: Click OK.
Step 9: On the Developer tab, click on Restrict Editing to launch the Restrict Editing pane.
Step 10: In the Restrict Editing pane, tick the box beside Limit formatting to a selection of styles.
Step 11: Tick the box beside Yes, Start Enforcing Protection.
Step 12: On the Start Enforcing Protection dialog box, choose between using a Password or User authentication to restrict access to the Word document.
Step 13: If you select the Password option, input your desired password. If you select the User authentication option, individual users listed on the More users exceptions field will be validated before they are allowed to edit the document.
Step 14: Click OK to save your selection.
Step 15: Save the document. After this, Word will lock the sections you chose to protect from others.
Locking Images in Microsoft Word
That’s it for how to lock parts of your Microsoft Word document. Both the restrict editing and content control feature on Microsoft Word can be used to also lock images. The above article may contain affiliate links which help support Guiding Tech. However, it does not affect our editorial integrity. The content remains unbiased and authentic.