The post will talk about all the customization options that you get for your Mac. These options will further help you to personalize your experience on Mac.
Check for macOS Update
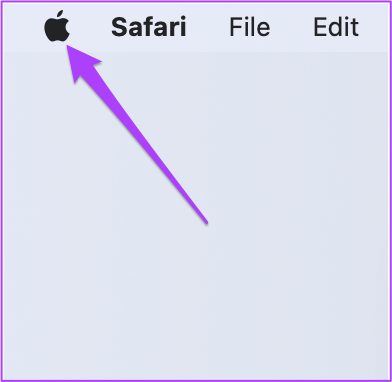
Before we begin with the features, we recommend you update the macOS version on your Mac since the feature is available with macOS Catalina, Big Sur and Monterey. Apple started providing two options to customize the mouse pointer with the release of macOS Catalina. But with the launch of macOS Monterey, more options to customize the mouse pointer came along. So in case you are using a version below macOS Catalina or macOS Monterey, we suggest you update macOS. Here’s how. Step 1: Click on the Apple icon at the top left corner.
Step 2: Select About This Mac from the dropdown menu.
Step 3: Click on Software Update.
Install an update if there is one available. Alternatively, you can check for updates using the following steps. Step 1: Press Cmd + Spacebar, type System Preferences and press Return.
Step 2: In the System Preferences menu, click on Software Updates.
In case your system doesn’t support macOS Catalina, you won’t be able to get the customization options for the mouse pointer. We have provided the list of options as per their macOS version availability.
Shake Mouse Pointer to Locate
The recent updates turn the mouse pointer into a black color and makes it difficult to locate the pointer. It becomes tougher if you’re using Mac with a larger monitor and your Home Screen is filled with lots of file and folder icons. Here’s how to check if it is enabled or not. This feature is available on macOS Monterey, Catalina and Big Sur. Step 1: Click on the System Preferences app icon to launch it.
Step 2: Click on Accessibility.
Step 3: Select Display from the left menu.
Step 4: In the Display settings window, click on the Pointer tab.
Step 5: Click the checkbox next to ‘Shake Mouse Pointer to Locate.’
After enabling this option, you can mouse pointer by just quickly moving your finger back and forth on the trackpad. If you are using an iMac, just move the Magic Mouse back and forth.
2. Change Pointer Size
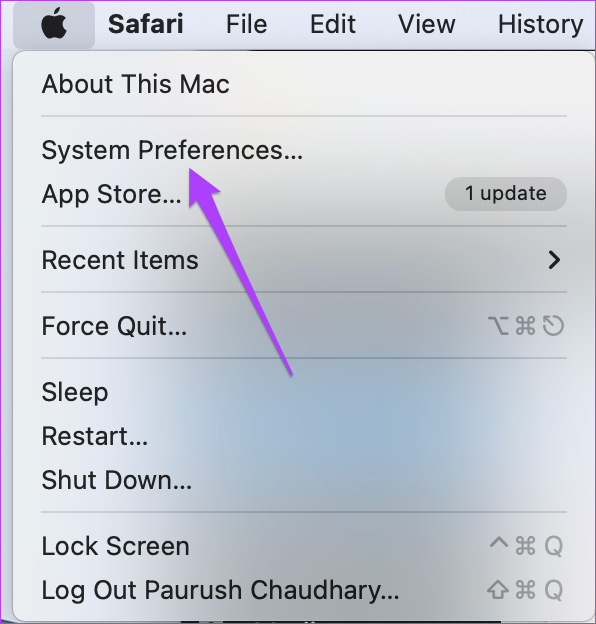
If you think the pointer size is too small, especially when you’re using the Mac with a large monitor, it’s only natural to bump its size. Also, larger mouse pointer size makes it easy to use the Mac for other users, like grandparents. Besides, it’s convenient to locate the pointer while working on different apps or browsing the web. Here’s how you can change the mouse pointer size. Step 1: Click the Apple icon at the top-left corner.
Step 2: Select System Preferences from the drop-down menu.
Step 3: Select Accessibility.
Step 4: Select Display from the left menu.
Step 5: Click on the Pointer tab.
Step 5: You can adjust the Pointer size using the slider.
Change Pointer Outline Color
The mouse pointer got new customization options with the macOS Monterey. For starters, you could change the pointer outline and match it with the accent color on your Mac. Here’s how to do it. Step 1: Click the Apple menu icon at the top-left corner.
Step 2: Select System Preferences.
Step 3: Select Accessibility.
Step 4: Select Display from the left menu.
Step 5: Select the Pointer tab.
Step 6: Tap on the white color strip alongside the Pointer outline color option.
Step 7: Select the pointer color of your choice from the color wheel.
Step 8: Close the color wheel to see the change.
4. Change Pointer Fill Color
You can also change the color of the pointer to make it easier to spot on the screen. There’s an option to play with the Pointer Fill Color as well. Follow these steps. Step 1: Open the Accessibility window in System Preferences as shown in the preview section. Go to the Pointer tab. Check the ‘Pointer fill color’ option on it.
Step 2: Click on the black strip to open the color wheel.
Step 3: Choose a relevant color from the color wheel and close the tab.
This is a good way to make sure your pointer matches your wallpaper or doesn’t disappear randomly. You can mix and match the outline and fill color depending on your choice.
5. Reset Mouse Pointer Settings
There’s a reason why these changes are personalized. You might not want someone else who uses your system for a few minutes to see them. Or if you are bored and want the pointer to appear the way it normally does, then you can remove all the changes. There is a Reset button on the Pointer tab in the Display option of Accessibility (refer to the steps above). Click on the Reset button to remove all your previous pointer preferences. After that, the mouse pointer will return to be the usual black one.
Customize Mouse Pointer on Mac
Apple’s macOS offers a native option to let you customize how the mouse pointer looks on your Mac or an external display. The native options are good enough so that you don’t have to install any third-party apps or programs just for that. If you’re using some interesting mouse pointer colors, feel free to share their pictures in the comments section below. The above article may contain affiliate links which help support Guiding Tech. However, it does not affect our editorial integrity. The content remains unbiased and authentic.


